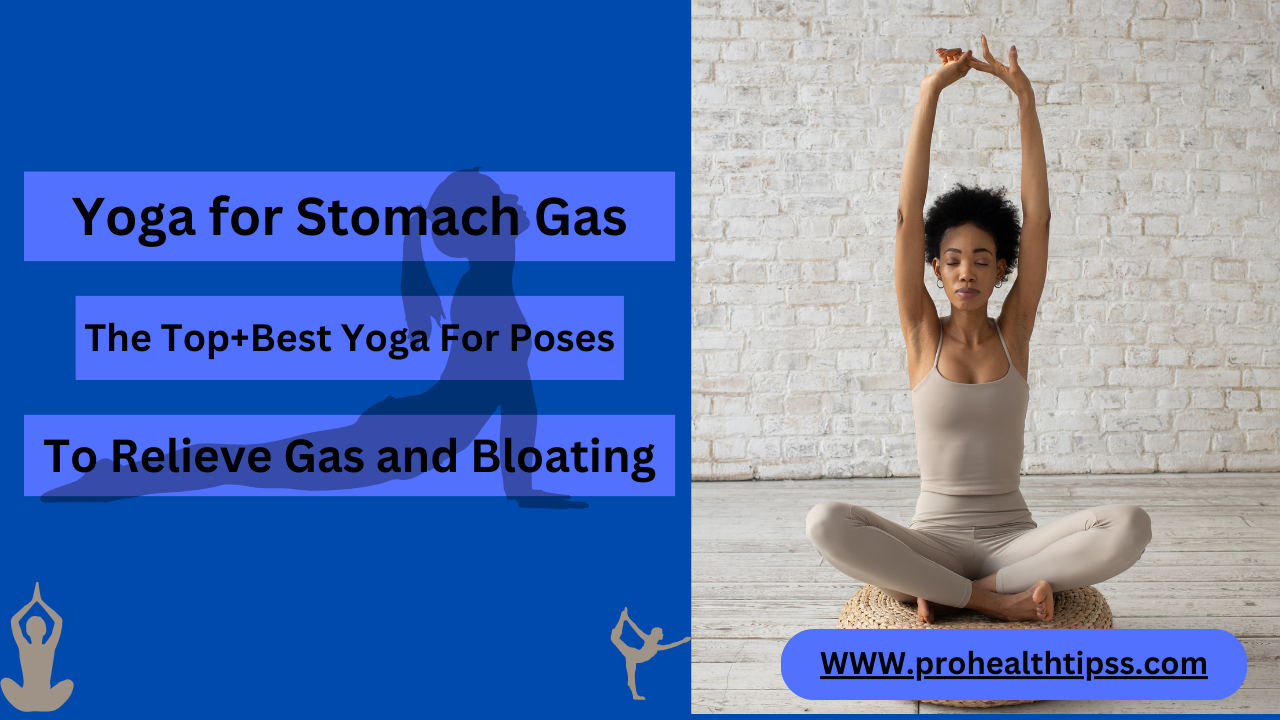
Yoga for Stomach Gas :The 10+ Best Yoga Poses To Relieve Gas and Bloating
Yoga serves as a valuable asset for addressing concerns related to stomach gas and weight loss objectives. Specific yoga poses and techniques, such as twists and deep breathing exercises, play a role in relieving stomach gas by stimulating healthy digestion and diminishing bloating. Furthermore, a consistent yoga practice aids in weight management by enhancing mindfulness, reducing stress levels, and fostering heightened body awareness. While yoga is not a standalone solution for substantial weight loss, it seamlessly complements a well-rounded diet and an active lifestyle, offering an effective and comprehensive approach to attaining both digestive comfort and weight control.
Yoga Positions to Relieve Gas and Bloating
The following 10 yoga exercises can be helpful for bloating and gas:
- Knees hugged to the chest, or Apanasana
- Spinal twist
- Bridge post, or Setu Bandha Sarvangasana
- One-legged seated spinal twist
- Seated forward bend pose, or Paschimottanasana
- Seated heart opener
- Cat and cow, or Marjaryasana and Bitilasana
- Child’s pose, or Balasana
- Downward-facing dog, or Adho Mukha Savasana
- Standing forward bend, or Uttanasana
- Open triangle pose, or Trikonasana
- Chair pose, or Utkatasana
- Breathe in and out, or Pranayama
You can do the poses with or without a mat. Some, like the bridge pose, are stretch moves that stimulate your abdominal organs. Next are twist poses that massage and tone your abdomen as a great therapy for gas, bloating, and constipation. The remaining poses work out your back, neck, and spine.
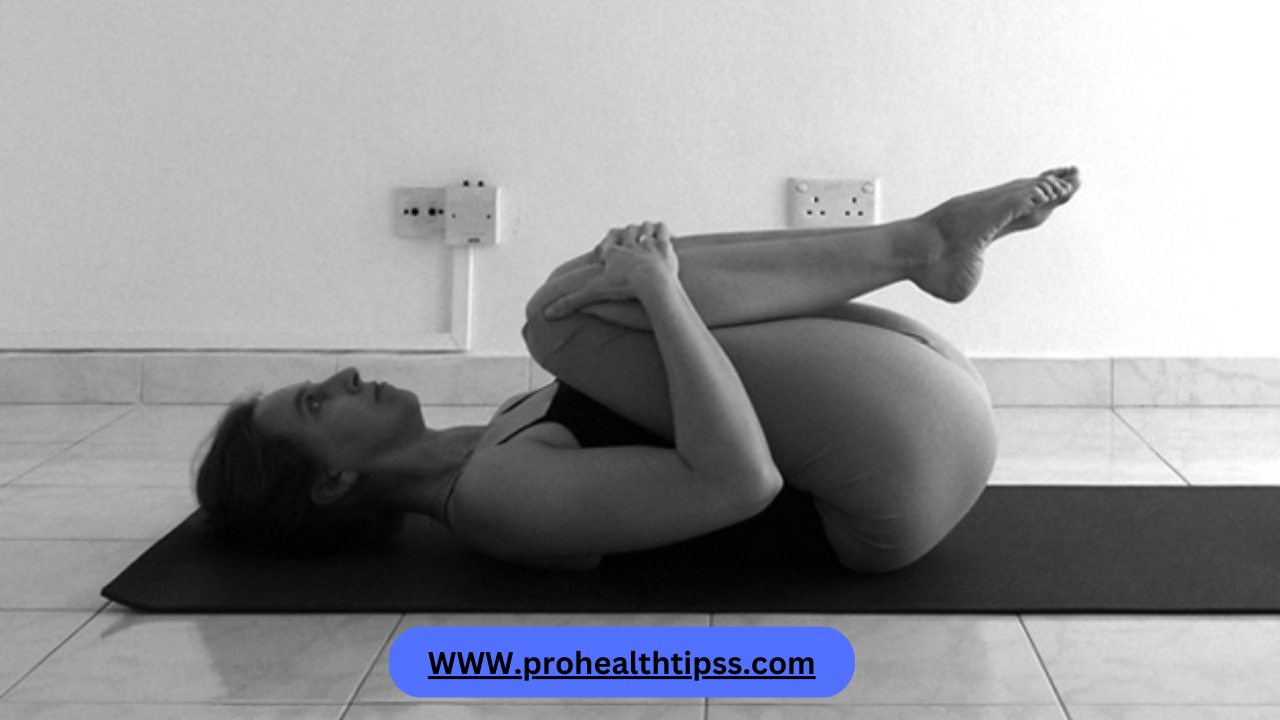
Knees hugged to the chest, or Apanasana
Apanasana, commonly known as “Knees Hugged to the Chest” or “Wind-Relieving Pose,” is a yoga pose that is simple yet highly effective for improving digestion, relieving gas, and promoting relaxation. Here’s how it works:
How It Works:
- Starting Position: Begin by lying flat on your back (supine position) with your legs extended.
- Execution: a. Inhale deeply. b. Exhale as you bend both knees towards your chest. c. Clasp your hands around your knees, hugging them close to your chest. d. Keep your back, neck, and head relaxed on the mat.
- Hold: Hold this position for 20-30 seconds, or longer if comfortable, while breathing deeply and evenly.
- Release: Slowly release your knees and return your legs to the extended position on an exhalation.
How It Helps: Apanasana works by compressing the abdominal area, which massages the internal organs, stimulates digestion, and helps in the elimination of excess gas. The gentle pressure on the abdomen also soothes discomfort and bloating.
Precautions: While Apanasana is generally safe for most people, there are some precautions to keep in mind:
- Back Issues: If you have a serious back injury or chronic back pain, approach this pose with caution. It’s advisable to consult a yoga instructor or healthcare professional for modified variations.
- Pregnancy: Pregnant individuals should perform Apanasana with care. It’s best to do this pose with the guidance of a qualified prenatal yoga instructor, as certain modifications may be necessary to accommodate the pregnancy.
- Digestive Disorders: If you have a severe digestive disorder or recent abdominal surgery, consult your healthcare provider before attempting this pose, as it involves pressure on the abdominal area.
- Comfort: Ensure that you’re comfortable in this pose and not straining or feeling any pain. If you experience discomfort, modify the pose or consult a yoga instructor for guidance.
- Breathing: Focus on deep and controlled breathing during the pose. Avoid breath-holding, as it can increase pressure on the abdomen.
Apanasana is a valuable yoga pose for promoting digestive health and relieving gas when practiced mindfully and with attention to these precautions. It’s always a good idea to consult with a qualified yoga instructor or healthcare provider if you have any concerns or specific medical conditions.
Spinal Twist
A spinal twist, often referred to as a seated or supine twist, is a yoga pose that involves twisting the upper body to one side while keeping the lower body stable. This pose offers several benefits for the spine and overall well-being. Here’s how it works and some precautions to keep in mind:
How It Works:
- Spinal Mobility: Spinal twists enhance the mobility of the spine, helping to counteract the effects of prolonged sitting and poor posture.
- Digestive Health: Twisting poses can stimulate the abdominal organs, aiding digestion and relieving issues like bloating and constipation.
- Stress Reduction: The gentle compression and release of the spine in a twist can have a relaxing effect on the nervous system, reducing stress and tension.
- Detoxification: Twists can assist in wringing out toxins from the body, which may help in detoxification processes.
- Improved Posture: Regular practice of spinal twists can contribute to better posture by increasing awareness of spinal alignment.

Precautions:
- Consult a Professional: If you have a history of spinal issues or injuries, it’s crucial to consult a qualified yoga instructor or a healthcare professional before attempting spinal twists.
- Warm-Up: Always warm up your body with gentle stretches or other yoga poses before attempting deeper twists. This helps prepare the spine and reduces the risk of injury.
- Listen to Your Body: Pay close attention to how your body feels during the twist. If you experience pain or discomfort, back off and modify the pose. Never force yourself into a twist.
- Breathe: Maintain steady, deep breathing throughout the twist. Avoid holding your breath, as this can increase tension and the risk of injury.
- Gradual Progression: Start with milder twists and gradually progress to deeper variations as your flexibility and comfort level improve.
- Avoid Over-Twisting: Avoid excessive twisting or attempting advanced variations without proper guidance. Over-twisting can strain the spine and lead to injury.
- Pregnancy: Pregnant individuals should consult their healthcare provider before practicing spinal twists, as these poses may not be suitable during pregnancy.
- Recent Surgery: If you’ve had recent abdominal or spinal surgery, avoid spinal twists until you’ve received clearance from your surgeon or healthcare provider.
Incorporating spinal twists into your yoga practice can be highly beneficial, but it’s essential to practice them mindfully and with respect for your body’s limitations. When done correctly and with proper precautions, spinal twists can contribute to improved spinal health, reduced stress, and enhanced overall well-being.
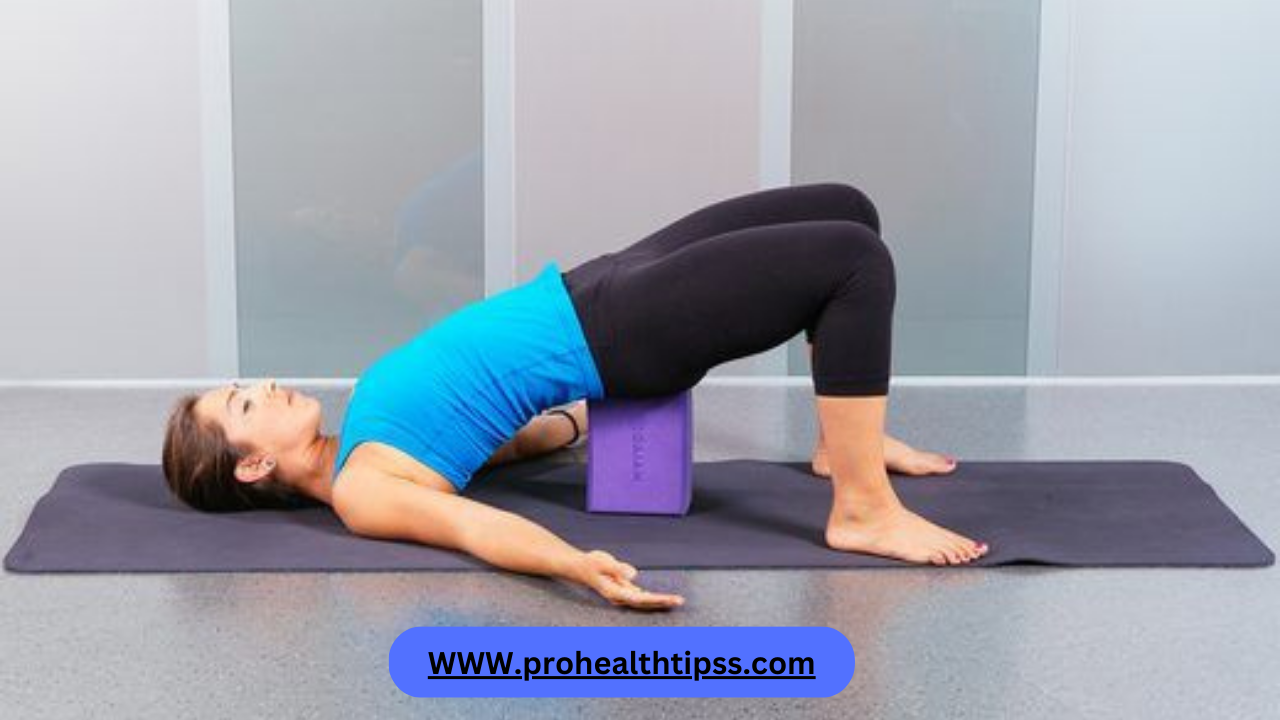
Bridge Pose (Setu Bandha Sarvangasana):
Bridge Pose is a rejuvenating yoga pose that primarily targets the back, chest, and legs. It’s a fantastic posture for strengthening the back muscles and opening up the chest, but it also offers several benefits for overall well-being.
How It Works:
- Strengthens the Back: Bridge Pose engages the muscles of the lower back, including the erector spinae, which helps improve spinal stability and posture.
- Stretches the Chest: As you lift your chest in Bridge Pose, it opens up the front of the body, stretching the chest muscles and promoting better lung capacity.
- Tones the Legs: This pose also activates the muscles in the legs, including the quadriceps and hamstrings, helping to tone and strengthen them.
- Stimulates the Thyroid: Bridge Pose stimulates the thyroid gland, which can help regulate metabolism and energy levels.
- Calms the Nervous System: The gentle inversion of the pose has a calming effect on the nervous system, reducing stress and anxiety.
Precautions:
While Bridge Pose offers many benefits, it’s essential to practice it with care, especially if you have certain health conditions or are a beginner:
- Neck Support: Avoid turning your head while in the pose. Keep your neck in a neutral position to prevent strain.
- Back Issues: If you have a history of back problems or are experiencing acute back pain, consult with a yoga instructor or healthcare provider before attempting Bridge Pose. Modify the pose or skip it if necessary.
- Neck Problems: Individuals with neck issues should avoid lifting their head off the floor during Bridge Pose. Keep your head on the mat to protect your neck.
- High Blood Pressure: If you have high blood pressure, it’s advisable to perform this pose without lifting your hips too high, as excessive elevation can increase blood pressure. Use props like a block or bolster under your hips for support.
- Pregnancy: Pregnant women should practice this pose with caution. Consider using props and consult with a prenatal yoga instructor for guidance.
- Injuries: If you have any recent injuries or medical conditions, consult a healthcare professional or experienced yoga instructor before attempting Bridge Pose or any yoga practice.
Remember to listen to your body, start slowly, and work within your limits. If you’re new to yoga or have specific concerns, it’s always a good idea to seek guidance from a qualified yoga instructor to ensure you’re practicing safely and effectively.
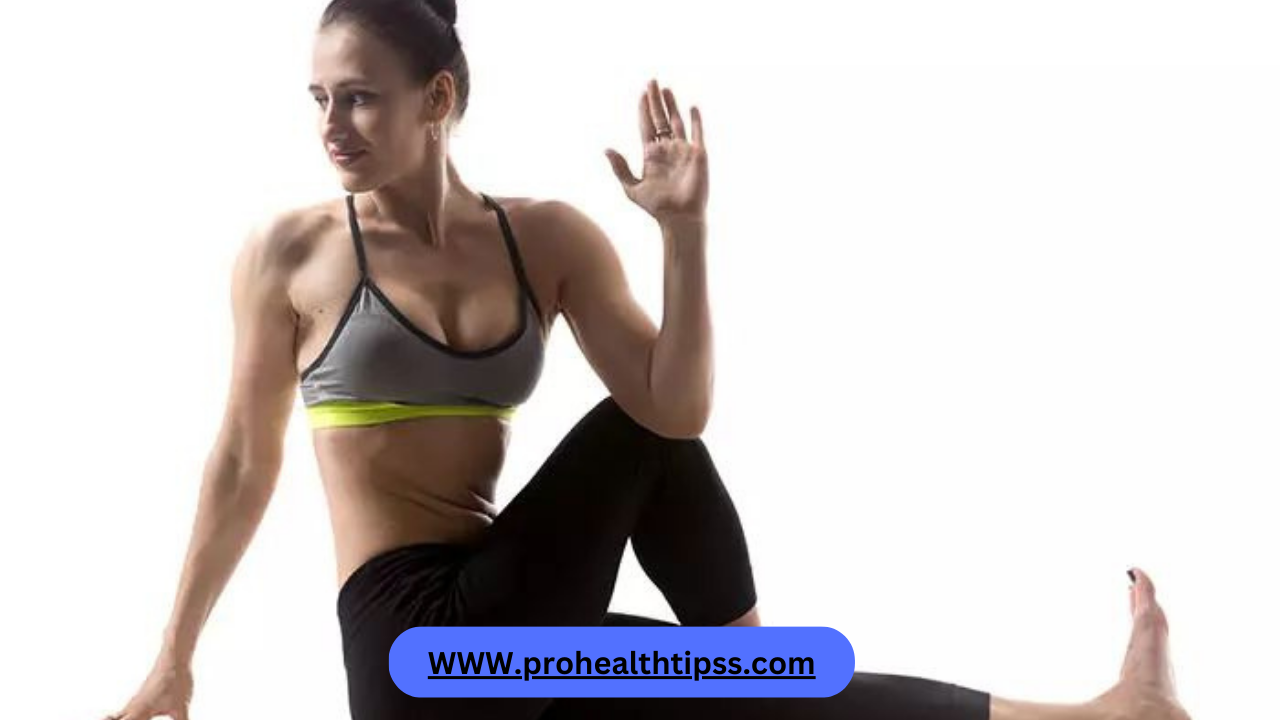
One-legged seated spinal twist
The One-Legged Seated Spinal Twist, often referred to as “Ardha Matsyendrasana” in yoga, is a beneficial pose for spinal flexibility and digestive health. Here’s how it works and some precautions to keep in mind:
How it Works:
- Starting Position: Begin by sitting on the floor with your legs extended in front of you.
- Bend One Leg: Bend your right knee and place your right foot on the outside of your left thigh, with your sole touching the floor.
- Spinal Twist: Inhale, lengthen your spine, and as you exhale, twist your torso to the right, placing your left elbow on the outside of your right knee. Keep your back straight.
- Hand Placement: Place your right hand on the floor just behind your sacrum for support.
- Gaze: Turn your head to the right, looking over your right shoulder.
- Hold and Breathe: Hold the pose for 20-30 seconds, breathing deeply and gradually increasing the duration as you become more comfortable.
- Repeat: Release the twist slowly and switch sides by bending your left knee and twisting to the left.
Precautions:
- Warm-Up: Ensure you are properly warmed up before attempting this pose, as it involves twisting the spine.
- Listen to Your Body: Pay close attention to your body’s signals. If you experience pain or discomfort, ease out of the pose immediately.
- Avoid Over-Twisting: Don’t force your body into a deep twist. The twist should come from the midsection of your spine, not your neck.
- Knee and Hip Issues: If you have knee or hip problems, approach this pose with caution. You may need to modify it or avoid it altogether.
- Pregnancy: Pregnant women should practice this pose with care, using props for support and not putting too much pressure on the abdomen.
- Digestive Issues: If you have severe digestive issues like hernia, ulcer, or recent abdominal surgery, consult a yoga instructor or healthcare professional before attempting this pose.
- Back Problems: Individuals with severe back problems, such as herniated discs, should avoid or modify this pose, and it’s best practiced under the guidance of an experienced yoga teacher.
- Breathing: Maintain deep and steady breathing throughout the pose. Never hold your breath.
The One-Legged Seated Spinal Twist can provide numerous benefits, including improved spinal flexibility, detoxification of internal organs, and relief from mild digestive discomfort. However, it’s essential to approach this pose mindfully and, if necessary, seek guidance from a qualified yoga instructor, especially if you have any underlying health concerns.
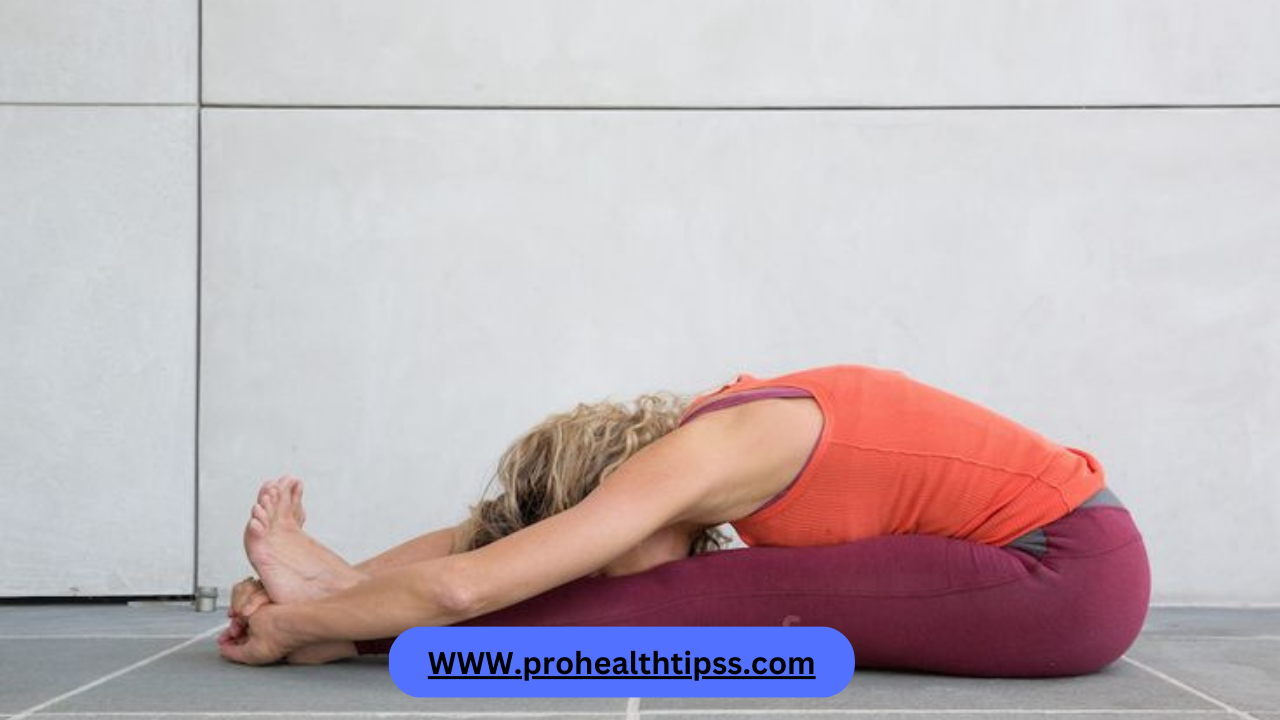
Seated forward bend pose, or Paschimottanasana
Paschimottanasana, also known as the Seated Forward Bend Pose, is a classic yoga asana that offers a range of physical and mental benefits. Here’s how it works and some precautions to keep in mind:
How It Works:
- Stretching the Spine: In Paschimottanasana, you sit with your legs extended and hinge at your hips to bend forward. This action stretches and lengthens the entire spine, promoting flexibility and alignment.
- Hamstring Stretch: The primary target of this pose is the hamstring muscles. Regular practice helps improve the flexibility of the hamstrings, which can alleviate lower back pain and improve posture.
- Massages Abdominal Organs: As you fold forward, the abdomen is compressed, which can stimulate the abdominal organs, enhancing digestion.
- Calms the Mind: This pose has a calming effect on the mind. The forward bend position allows you to focus inward, promoting relaxation and reducing stress and anxiety.
- Balances the Nervous System: Paschimottanasana is also believed to balance the parasympathetic and sympathetic nervous systems, promoting overall nervous system health.
Precautions:
- Warm-Up: It’s crucial to warm up before attempting Paschimottanasana to avoid straining muscles. Gentle stretches for the hamstrings and lower back are recommended.
- Avoid Overstretching: Do not force yourself into a deep forward bend. Go only as far as your body allows, and with consistent practice, your flexibility will improve gradually.
- Bend at the Hips: The forward movement should come from the hips, not the waist. This prevents excessive rounding of the lower back.
- Engage Core Muscles: Engage your core muscles to support your lower back and protect it from strain.
- Breathe: Maintain steady, deep breathing throughout the pose. Do not hold your breath.
- Avoid if Pregnant: Pregnant women should perform Paschimottanasana with caution or avoid it altogether, especially in the later stages of pregnancy, to prevent pressure on the abdomen.
- Injuries and Conditions: Individuals with back injuries, sciatica, or herniated discs should approach this pose with care or consult a yoga instructor or healthcare professional for modifications.
- High Blood Pressure: People with high blood pressure should practice this pose with their head elevated or consult a healthcare professional.
Remember that yoga should be practiced mindfully, and it’s essential to listen to your body. If you are new to yoga or have any underlying medical conditions, it’s advisable to seek guidance from a certified yoga instructor or healthcare provider to ensure safe and effective practice of Paschimottanasana.
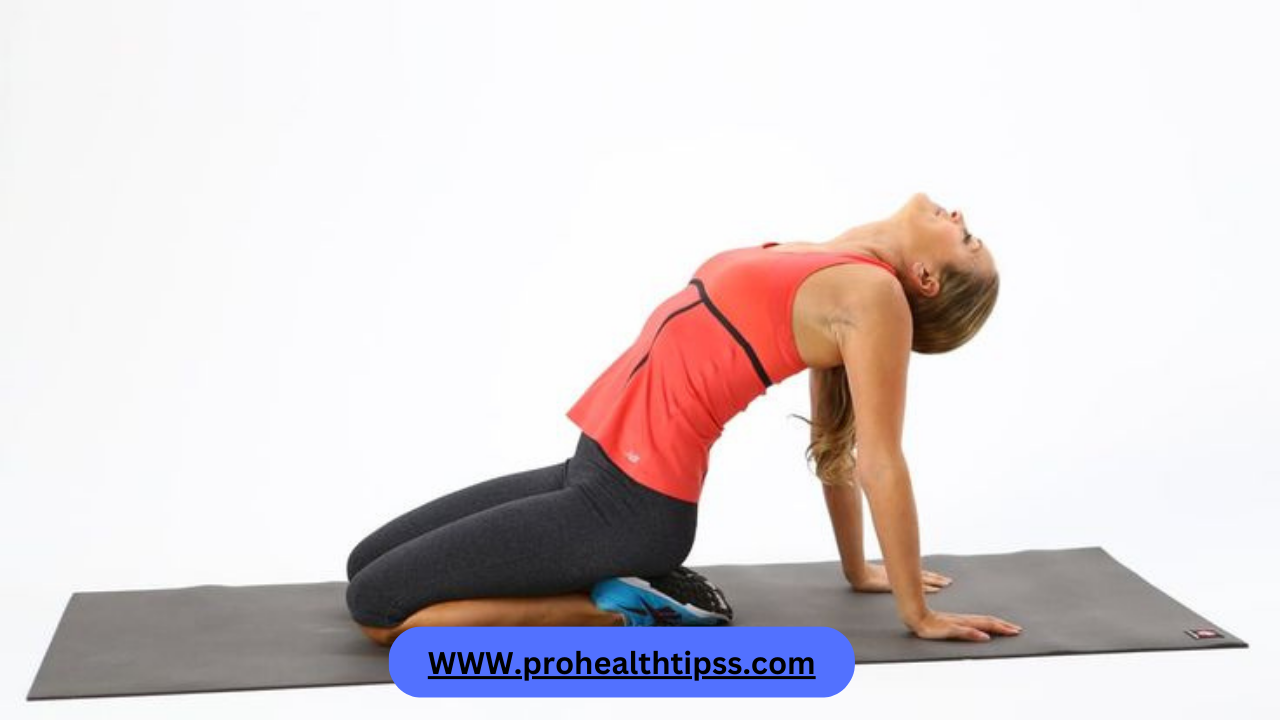
Seated heart opener
The Seated Heart Opener is a yoga pose that can help open up the chest and promote flexibility in the thoracic spine. Here’s how it works and some precautions to keep in mind:
How It Works:
- Starting Position: Begin in a seated position with your legs extended straight out in front of you.
- Hand Placement: Place your hands on the ground behind your hips with your fingers pointing away from your body and your palms flat on the ground.
- Lift Your Hips: Press into your hands and lift your hips off the ground. Your chest will open up, and you’ll feel a stretch across the front of your chest and shoulders.
- Head Position: Keep your head in a neutral position or gently tilt it back to increase the stretch in your chest.
- Breathing: Take slow, deep breaths as you hold the pose, focusing on expanding your chest with each inhale.
- Release: To exit the pose, lower your hips back down to the ground and stretch your legs out in front of you.
Precautions:
- Warm-Up: Before attempting the Seated Heart Opener, it’s crucial to warm up your body, especially your shoulders, neck, and spine. Gentle shoulder rolls and neck stretches can help prepare these areas for the pose.
- Neck Sensitivity: If you have neck issues or discomfort, avoid tilting your head back too far. Keep your neck in a comfortable and safe position.
- Spinal Health: If you have any existing spinal conditions or injuries, consult with a healthcare professional or yoga instructor before attempting this pose. Modify the pose if needed to avoid strain.
- Limited Mobility: If you find it challenging to lift your hips off the ground, you can use props like yoga blocks or a cushion under your hands to reduce the intensity of the stretch.
- Breathing: Focus on your breath during the pose, and if you feel any discomfort or strain in your chest or shoulders, ease out of the pose and return to a comfortable seated position.
- Progress Gradually: If you are new to this pose, take your time and don’t force your body into a deep backbend. Gradually work on improving your flexibility and strength over time.
The Seated Heart Opener can be a beneficial pose for improving posture, relieving tension in the chest and shoulders, and promoting emotional openness. However, it’s essential to practice it mindfully and with awareness of your body’s limitations to ensure a safe and effective experience. If you have any concerns or medical conditions, consider consulting a qualified yoga instructor or healthcare professional before attempting this or any yoga pose.
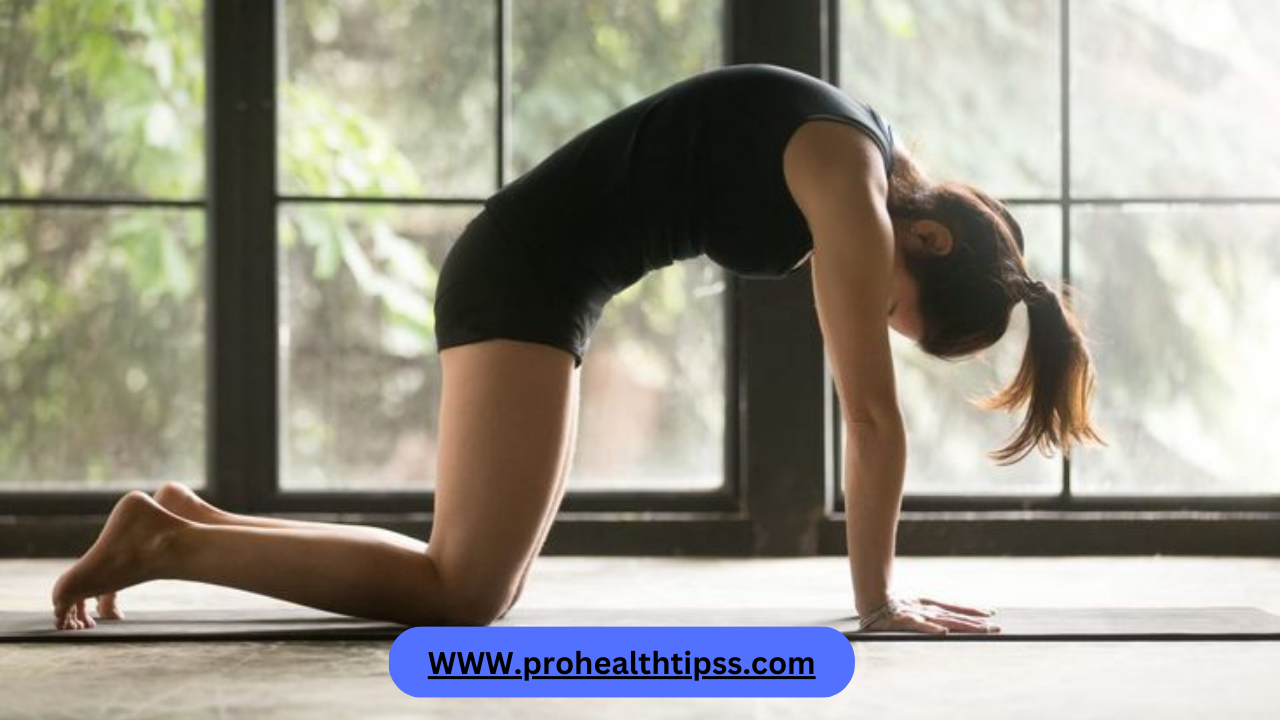
Cat and cow, or Marjaryasana and Bitilasana
Cat-Cow, also known as Marjaryasana and Bitilasana, is a dynamic and beneficial yoga sequence that involves two poses, often practiced together. Here’s how it works and some precautions to keep in mind:
How it Works:
- Marjaryasana (Cat Pose): Start on your hands and knees in a tabletop position. Inhale as you arch your back, lifting your tailbone and head towards the ceiling. This is the “cow” part of the sequence. It stretches your front body, opens the chest, and strengthens the spine.
- Bitilasana (Cow Pose): Exhale as you round your back, tucking your chin towards your chest and drawing your belly button toward your spine. This is the “cat” part of the sequence. Cow pose flexes the spine, stretches the back, and engages the core muscles.
- Flow: Repeat the Cat-Cow sequence, coordinating your breath with the movements. Inhale into Cow Pose and exhale into Cat Pose. Continue this fluid motion for several breaths, allowing your breath to guide the rhythm of your movement.
Precautions:
- Neck and Spine: Be gentle with your neck and spine. Avoid excessive arching or rounding, and don’t force your head back too far in Cow Pose or tuck it too deeply in Cat Pose. Keep your neck in line with your spine.
- Breath Awareness: Sync your breath with your movements. Inhale during Cow Pose to expand your chest, and exhale during Cat Pose to contract your core. This enhances the therapeutic benefits and maintains the flow.
- Wrist and Knee Care: Distribute your weight evenly on your hands and knees to protect your wrists and knees. Use a padded surface or a yoga mat if needed.
- Listen to Your Body: If you have any neck, back, or wrist injuries or conditions, consult a yoga instructor or healthcare professional before attempting Cat-Cow. Modify the poses as necessary to suit your body’s limitations.
- Pregnancy: Pregnant individuals should perform Cat-Cow with caution. Keep the movements gentle and avoid deep arching or rounding of the back. Consult with a qualified prenatal yoga instructor for guidance.
- Breath Consistency: Maintain a steady and rhythmic breath. Don’t hold your breath during any part of the sequence.
Cat-Cow is an excellent warm-up or gentle exercise to improve spinal flexibility, relieve tension, and cultivate body awareness. When practiced mindfully and with attention to these precautions, it can be a safe and beneficial addition to your yoga routine.
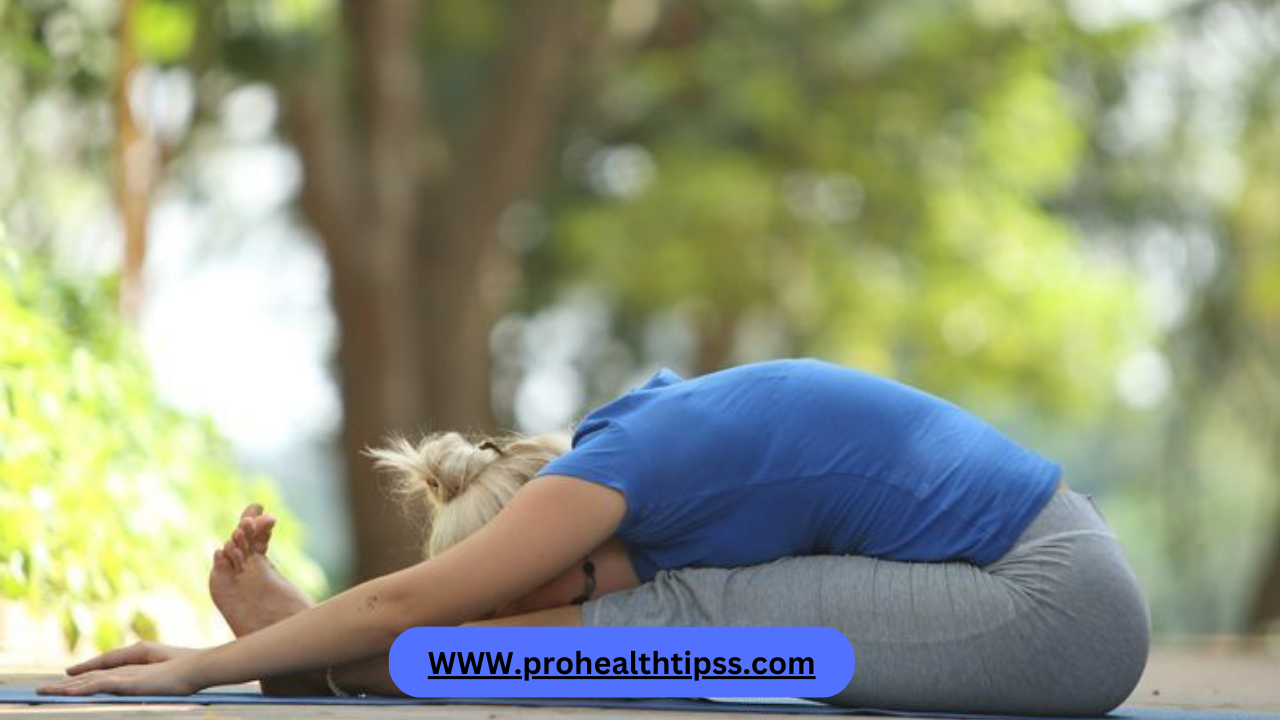
Child’s Pose (Balasana)
Child’s Pose, or Balasana, is a foundational yoga pose that provides numerous physical and mental benefits. Here’s how it works and some precautions to keep in mind:
How It Works: Child’s Pose is a resting and grounding pose that is often used as a transition between more strenuous yoga poses. Here’s how to perform it:
- Start in a kneeling position on your mat with your big toes touching and knees spread apart, about hip-width or slightly wider.
- Sit back on your heels and exhale as you fold forward from your hips.
- Extend your arms forward and rest your forehead on the mat. Your chest should rest on or between your thighs.
- Relax your shoulders and let your arms rest on the floor, palms facing down.
- Breathe deeply and slowly in this position, focusing on elongating your spine and relaxing any tension in your back, neck, and shoulders.
Benefits:
- Stress Reduction: Child’s Pose is excellent for calming the mind and reducing stress and anxiety.
- Back Relief: It gently stretches the lower back and can provide relief from back pain.
- Digestive Aid: The pressure on the abdomen can help improve digestion and relieve gas and bloating.
- Hip Flexor Stretch: It stretches the hips and can be beneficial for those with tight hip flexors.
Precautions: While Child’s Pose is generally safe for most people, there are a few precautions to consider:
- Knee Issues: If you have knee problems, use a folded blanket or cushion under your knees to reduce pressure.
- Pregnancy: Pregnant individuals should practice Child’s Pose with their knees spread wider to accommodate their belly. Avoid deep pressure on the abdomen.
- Injury or Pain: If you have any recent injuries or pain in your knees, hips, or back, consult a yoga instructor or healthcare professional before attempting Child’s Pose.
- Breathing: Focus on deep and steady breathing. If you have difficulty breathing comfortably in this pose, consider modifying it to better suit your comfort level.
Child’s Pose is a versatile and rejuvenating yoga pose that can be adapted to suit individual needs and abilities. It’s an excellent addition to any yoga practice and can be used as a relaxation and centering pose in between more dynamic postures. Always listen to your body and make modifications as needed to ensure a safe and comfortable practice.
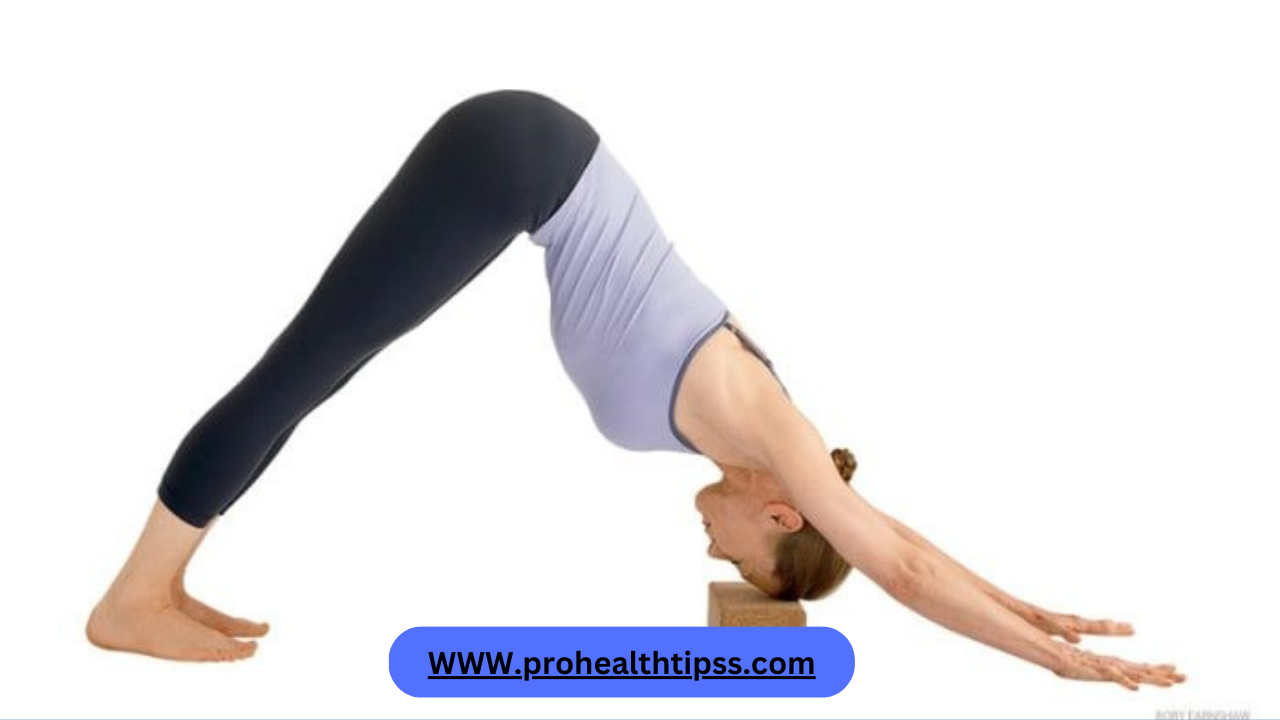
Downward-facing dog, or Adho Mukha Savasana
Downward-Facing Dog, or Adho Mukha Svanasana, is a foundational yoga pose that offers numerous physical and mental benefits. Here’s how it works and some precautions to keep in mind:
How it Works:
- Starting Position: Begin on your hands and knees in a tabletop position, with your wrists aligned under your shoulders and knees under your hips.
- Transition: Exhale and lift your knees away from the floor while straightening your legs. Your body should form an inverted “V” shape.
- Alignment: Spread your fingers wide, press firmly into your palms, and rotate your upper arms outward. Your feet should be hip-width apart, and your toes pointing forward. Engage your quadriceps to lift your thighs.
- Hips High: Lift your sit bones towards the ceiling, lengthening your spine. Imagine your body as an inverted “A” rather than a “V.” Keep your back straight, avoiding rounding or overarching.
- Heels Down: Ideally, both your heels touch the floor, but if they don’t, it’s okay. You can bend your knees slightly to achieve this if needed.
- Head Position: Relax your neck and let your head hang naturally between your arms. Your gaze can be directed towards your feet or navel.
How it Benefits:
- Strengthens: Downward Dog builds strength in your arms, shoulders, back, and legs.
- Stretches: It stretches the hamstrings, calves, shoulders, and arches of your feet.
- Improves Circulation: This pose encourages blood flow to the brain and can be invigorating.
- Relieves Tension: It can alleviate tension in the neck, shoulders, and spine.
- Calms the Mind: Downward Dog is often used as a resting pose, allowing you to center your thoughts and calm your mind.
Precautions:
- Wrist Pain: If you have wrist issues, you can place a folded mat or towel under your wrists for cushioning. Distribute weight evenly across your palms to reduce wrist strain.
- Shoulder or Neck Problems: If you have shoulder or neck injuries, consult a yoga instructor for modifications or avoid the pose altogether.
- High Blood Pressure: If you have high blood pressure, consult your healthcare provider before practicing Downward Dog. You may need to modify the pose by keeping your head above your heart.
- Pregnancy: Pregnant individuals should practice with caution. Consider using props or practicing against a wall for support.
- Tight Hamstrings: If your hamstrings are tight, it’s okay to keep your knees slightly bent or use props like yoga blocks under your hands to make the pose more accessible.
- Overexertion: Don’t force your body into the pose. Ease into it and gradually work on flexibility and strength to avoid overexertion or injury.
Always listen to your body, and if you’re new to yoga or have specific health concerns, it’s advisable to practice under the guidance of a qualified yoga instructor who can provide personalized adjustments and advice.
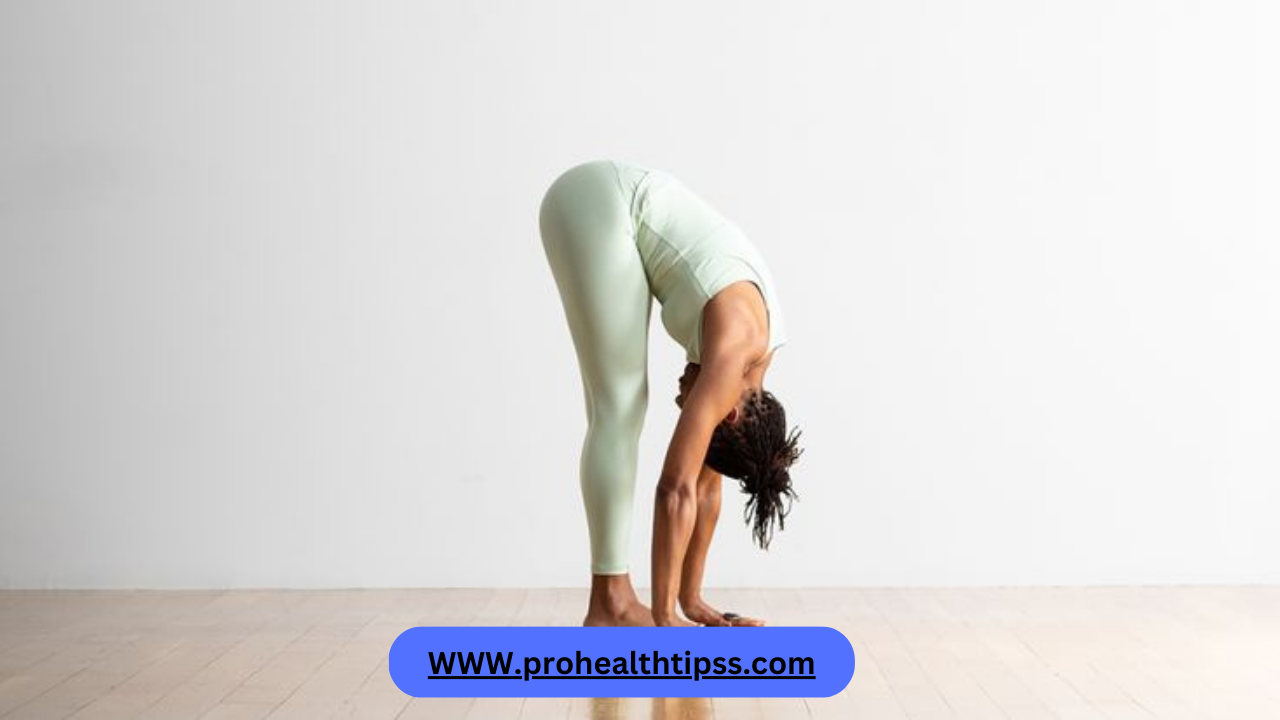
Standing forward bend, or Uttanasana
How It Works:
Standing Forward Bend, or Uttanasana, is a yoga pose that involves bending forward from a standing position, reaching towards your toes or the ground. This asana offers numerous benefits:
- Stretches the Hamstrings: Uttanasana provides an excellent stretch to the hamstring muscles at the back of your thighs. Regular practice can help increase flexibility in this area.
- Strengthens the Back: While folding forward, your back muscles are engaged. Over time, this can help strengthen the muscles along your spine.
- Calms the Mind: Uttanasana is considered a calming pose. It can help relieve stress and anxiety while promoting relaxation.
- Improves Digestion: The gentle compression of the abdomen in this pose can aid in massaging the internal organs, potentially improving digestion and relieving minor digestive issues.
- Enhances Posture: Regular practice of Uttanasana can lead to improved posture as it encourages you to lengthen your spine and maintain a straight back.
Precautions:
While Standing Forward Bend can offer numerous benefits, it’s important to practice it mindfully and with some precautions:
- Bend Your Knees: If you’re a beginner or have tight hamstrings, it’s advisable to bend your knees slightly in this pose to avoid straining them. As you become more flexible, you can gradually straighten your legs.
- Avoid Jerky Movements: When coming into or out of Uttanasana, avoid jerky or sudden movements, as this can strain your back or hamstrings.
- Don’t Overdo It: Avoid forcing yourself too deeply into the pose. Go only as far as your body comfortably allows, and respect your limits.
- High Blood Pressure: If you have high blood pressure, it’s a good idea to consult with a yoga instructor or healthcare provider before practicing Uttanasana, as the inversion can affect blood pressure.
- Back Injuries: Individuals with existing back injuries or problems should be cautious and may need modifications or avoid this pose altogether.
- Pregnancy: Pregnant women should practice Uttanasana with bent knees to avoid pressure on the abdomen. Consulting with a prenatal yoga instructor is advisable.
Always listen to your body and practice yoga mindfully. If you have any underlying health conditions or concerns, it’s best to consult a qualified yoga instructor or healthcare provider before attempting advanced yoga poses like Uttanasana to ensure it’s safe and suitable for your individual needs.
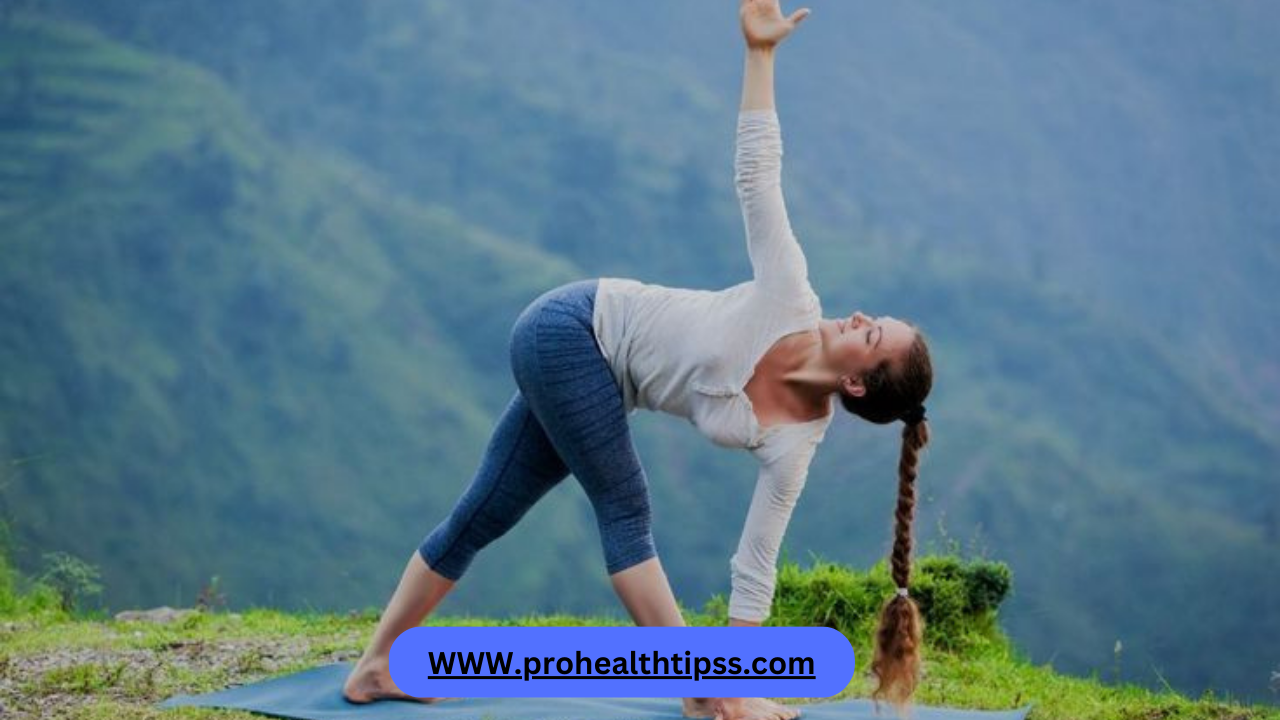
Trikonasana, or Open Triangle Pose
Trikonasana, commonly known as the Open Triangle Pose, is a foundational yoga posture that offers a range of physical and mental benefits. Here’s how it works and some precautions to keep in mind:
How Trikonasana Works:
- Strengthening and Stretching: Trikonasana primarily targets the legs, hips, spine, and shoulders. As you extend your legs apart and reach one arm toward the ground and the other up toward the sky, it engages and strengthens the leg muscles, stretches the groin, and promotes flexibility in the spine.
- Balance and Alignment: This pose enhances balance and body awareness. It requires careful alignment of the feet, legs, and torso, which can help improve posture and stability.
- Digestive Aid: Trikonasana stimulates the abdominal organs, potentially aiding digestion and alleviating mild digestive discomfort.
- Stress Reduction: Like many yoga poses, Trikonasana encourages deep, mindful breathing, which can reduce stress and promote a sense of calm.
Precautions and Tips:
- Warm-Up: Always perform a gentle warm-up before attempting Trikonasana to prepare your muscles and joints.
- Consult a Teacher: If you’re new to yoga or have any medical conditions or injuries, it’s advisable to consult a qualified yoga instructor for proper guidance and modifications.
- Alignment Matters: Pay close attention to alignment. Your feet should be about three to four feet apart, with the front foot pointing forward and the back foot turned slightly inward. Keep your hips and chest open.
- Avoid Overstretching: While the pose involves a stretch, avoid pushing yourself too far. Only go as deep into the pose as your body comfortably allows, and avoid forcing your hand to touch the ground if it doesn’t reach.
- Neck Safety: Be cautious with your neck. Instead of looking up at your raised hand, keep your gaze straight ahead or downward to protect your neck.
- Modifications: If you have difficulty reaching the ground, you can place your hand on.
Trikonasana, when practiced mindfully and with proper alignment, can be a beneficial addition to your yoga routine, promoting strength, flexibility, and balance. However, it’s important to practice with awareness of your body’s limitations and to consult an experienced yoga instructor or healthcare provider if you have any concerns or specific health conditions.
Chair pose, or Utkatasana
Chair pose, known as Utkatasana in yoga, is a powerful standing posture that offers numerous benefits for strength, flexibility, and balance. Here’s how it works and some precautions to keep in mind:
How it Works:
- Starting Position: Begin in a standing position with your feet hip-width apart and your arms at your sides, palms facing inward.
- Chair Formation: Inhale and raise your arms overhead, parallel to each other, and bring your palms together in a prayer position (Namaste) or keep them shoulder-width apart. As you do this, shift your weight back onto your heels.
- Squatting Motion: Exhale and begin to lower your body as if you are sitting back into an imaginary chair. Your knees should remain aligned with your ankles, and your thighs should be as parallel to the floor as possible.
- Alignment: Keep your spine straight and your chest lifted. Engage your core muscles to protect your lower back.
- Gaze: Look straight ahead or slightly upward, maintaining a steady and focused gaze.
- Breathing: Breathe deeply and smoothly as you hold the pose for as long as comfortable. Beginners can start with 10-15 seconds and gradually work up to longer durations.
Precautions:
- Knee and Ankle Sensitivity: If you have knee or ankle issues, practice this pose with caution. You can modify by not squatting as deeply or by using props like a block under your heels for added support.
- Back Problems: Individuals with lower back problems should be cautious while performing Chair pose. Focus on maintaining a straight spine and engage your core muscles to protect your lower back. If you experience pain, consider avoiding this pose or consulting a yoga instructor for modifications.
- High Blood Pressure: If you have high blood pressure, avoid raising your arms overhead, as it can increase blood pressure. Keep your hands on your hips or in a prayer position at your chest.
- Pregnancy: Pregnant women should be careful while practicing Chair pose. It’s advisable to consult with a prenatal yoga instructor for guidance and use props for support if needed.
- Balance Issues: This pose requires good balance. If you have balance issues, practice near a wall or use a chair for support.
- Breathing: Avoid holding your breath. Continue to breathe deeply and evenly throughout the pose.
Chair pose, when practiced correctly and with awareness, can strengthen your thighs, glutes, and core muscles, improve your posture, and increase your mental focus. However, it’s essential to listen to your body and make necessary modifications to ensure your safety and comfort during the practice. If you’re new to yoga or have specific concerns, consider seeking guidance from a qualified yoga instructor.
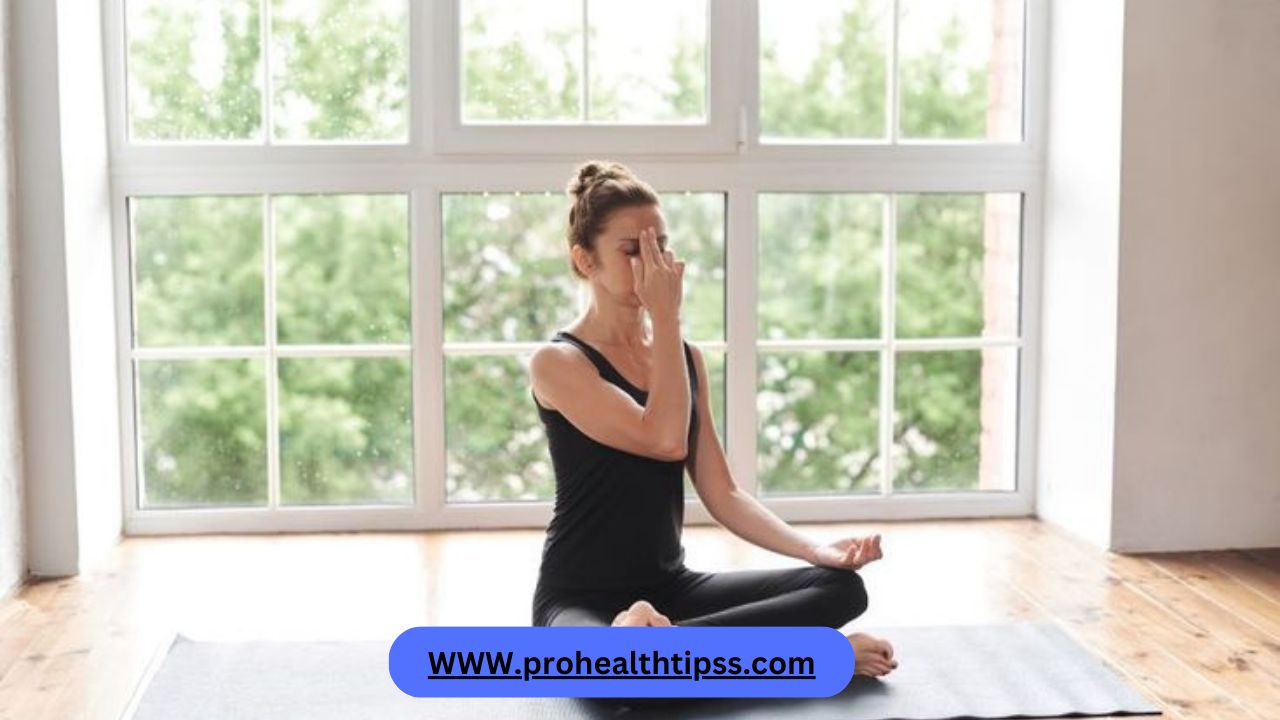
Breathe In and Out: Understanding Pranayama
Pranayama, the Art of Breath: Pranayama, a fundamental component of yoga, is the practice of controlling the breath to enhance physical, mental, and spiritual well-being. The word “pranayama” derives from two Sanskrit words: “prana,” meaning life force or energy, and “ayama,” meaning control or extension. Pranayama techniques involve regulating the breath through various patterns, durations, and ratios, ultimately aiming to balance and harness this vital life force within us.
How Pranayama Works: Pranayama works on several levels to benefit the practitioner:
- Physical Health: Pranayama improves lung capacity, oxygenates the blood, and enhances overall respiratory health. It can help manage conditions like asthma and reduce the risk of respiratory ailments.
- Mental Calm: Deep and controlled breathing patterns in pranayama calm the mind, reduce stress, and promote mental clarity. It’s a powerful tool for managing anxiety and emotional balance.
- Energy Flow: By regulating the breath, pranayama ensures a smoother flow of prana throughout the body’s energy channels (nadis). This promotes vitality and balance in the body’s systems.
- Spiritual Connection: In yogic philosophy, pranayama facilitates a deeper connection with the inner self and the universal life force. It is often used as a preparatory practice for meditation.
Precautions When Practicing Pranayama:
While pranayama offers numerous benefits, it’s essential to approach it with care, especially if you’re new to the practice:
- Learn from a Qualified Instructor: It’s crucial to learn pranayama techniques under the guidance of a qualified yoga instructor. They can ensure you’re practicing safely and correctly.
- Start Slowly: Beginners should begin with simple, slow-paced pranayama techniques like Diaphragmatic Breathing (Belly Breathing) before progressing to more advanced practices.
- Listen to Your Body: Pay attention to how your body responds during pranayama. If you feel dizzy, lightheaded, or experience discomfort, stop immediately and consult your instructor.
- Avoid Strain: Never force your breath. Pranayama should be comfortable and relaxing. Overexertion can lead to hyperventilation or other complications.
- Respect Individual Limitations: Pranayama may not be suitable for everyone, especially those with certain medical conditions. Consult a healthcare professional before starting pranayama if you have concerns.
- Practice Mindfulness: Combine pranayama with mindfulness. Be aware of your breath, thoughts, and sensations. This enhances the practice’s effectiveness and safety.
Incorporating pranayama into your daily routine can have profound physical, mental, and spiritual benefits. When practiced mindfully and with proper guidance, it becomes a transformative tool for achieving a balanced and harmonious life.
Benefits
Yoga for stomach gas offers numerous benefits for digestive health and overall well-being. Specific yoga poses, like Pawanmuktasana and Child’s Pose, help to alleviate stomach gas by massaging and relaxing the abdominal area, promoting better digestion and reducing bloating. These practices also enhance blood circulation, which can further aid in the efficient elimination of gas. Regular yoga sessions not only provide relief from digestive discomfort but also contribute to stress reduction and mental clarity, fostering a holistic sense of health and balance in the body. By incorporating yoga into your routine, you can enjoy improved digestive comfort and a greater sense of overall wellness.Read More 50 Benefits of Yoga Click Here
Points To Be Remember:-
If you often suffer from flatulence or constipation, then you should drink lukewarm water throughout the day. Keep in mind that things like sweet beverages, cold drinks or soda can cause severe gas in the stomach. Include fruits like banana, papaya, blackberries, carrots, orange and pineapple in your diet.
PROHEALTHTIPSS Suggestion
When it comes to alleviating stomach gas, consider incorporating specific yoga poses and practices into your routine. Poses like Pawanmuktasana (Wind-Relieving Pose) and Child’s Pose are excellent choices as they gently compress and massage the abdominal area, aiding in gas release and digestive relief. Twisting poses such as Ardha Matsyendrasana can also be effective in wringing out trapped gas. Alongside these poses, deep and mindful breathing techniques, like Pranayama, can enhance digestion and reduce bloating. Regular practice of these yoga techniques, combined with a balanced diet and hydration, can contribute significantly to a more comfortable and gas-free digestive experience.
Conclusion
Yoga emerges as a highly effective and natural remedy for addressing stomach gas and promoting digestive well-being. Through specific poses and practices, such as Pawanmuktasana and Child’s Pose, yoga helps relieve gas by massaging the abdominal area, encouraging optimal digestion, and reducing bloating. Furthermore, the holistic benefits of yoga extend beyond just physical relief, encompassing mental clarity and stress reduction. Incorporating yoga into your daily routine offers a comprehensive approach to managing stomach gas discomfort, fostering a healthier and more balanced digestive system, and promoting overall wellness.